Quality Wedding Films In Australia

In the exposure mode, you can manually set the shutter speed, while the aperture value is set automatically according to the brightness of the subject. A high shutter speed lets you resume the movement of a rapidly moving subject. With a slow shutter speed, the subject will appear blurry to give the impression of movement. Think about it, how often do you take photos at a party, at a wedding (or other ceremonies), in the theater, while you’re out at night? How many of these photos are moved, severely underexposed, excessively grainy (because of the noise)? Fortunately, there are some tricks that can save us on these occasions, some valid for any digital camera, others only for reflexes linked to Wedding Films. First of all, watch the exposure triangle. Our goal is to get the camera as much light as possible, since there is little. To do this, the three parameters of the exposure triangle must be configured as follows: the opening must be low (ie it must be wider), the ISO must be high and the exposure time must be long to ensure quality Wedding Films. Obviously, the three values cannot be raised and lowered indiscriminately, because every change has consequences on the final aspect of the photo (to know which lowering the opening decreases the depth of field , raising the ISO increases noise, a too slow exposure time causes blurry photos. Let’s say that, on many occasions, you can trust to use the lowest aperture value offered by the camera and the lens you are using. For the exposure time, better not to go below 1/60s, in general. In more particular cases, when the framed Wedding Films subjects move quickly, you will have to use shorter times (therefore with smaller values). The speech of ISO becomes more delicate. The most common cameras, that is all the compact cameras and the bridges as well as the cheapest cameras, have excellent performance for the highest ISO values. This means that, going up to ISO values that could be very useful when the light gets really poor, the noise introduced in the photos becomes easily unacceptable. For example, my Nikon D3000, with ISO values above 800, often makes photos unwatchable (although it could reach 3200 for Wedding Films). If possible, it is better to know the value of ISO than not to go, peculiar to each camera. Trying to take several photos for each available value, it is easy to understand the limit beyond which not to go. However, when it becomes necessary to use excessively high values, you can still count on the removal of the noise that can be made through the photo editing programs.
The Best Payment Plan For A Design Agency In Seattle
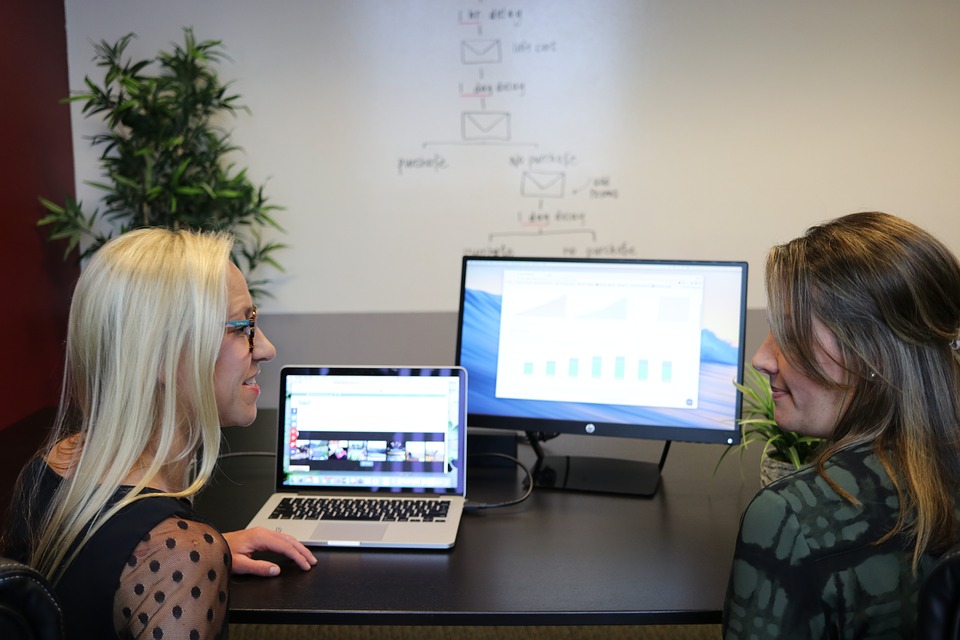
Design agency pricing and payment plan is a topic that has been widely discussed for years. Each payment model, of course, has its own advantages and disadvantages. Additionally, what might work perfectly for one business may not necessarily be great for another. As a guide, here is a quick look at the different payment plans for design agency Seattle. Hourly Payment Hourly payment plan can be excellent because it a quantifiable and has straightforward terms. Hourly prices do vary a lot from on company to the other. It could be from $50 to as much as $300 per hour. There are many factors that affect how much a firm will charge. These include size of the firm, reputation, and services they carry. Advantages • It has high level of transparency and accountability • It lets you allocate time extremely specifically • Breakdown of costs of services are available • You get set hourly rates Disadvantages • Results may not be visible quickly as the process often requires more time, and most companies are not patient enough to see results. • It could be more expensive than your initial budget Monthly Payment Monthly payment models are among the most common pricing plans, but it may start to shift with recent interest in hourly plans. In the case of monthly plans, clients will be required to pay a set fee every month and in return get a specific list of services. Advantages • You get unlimited hours and don’t have to b restricted to hourly plans • The agency can’t claim that they didn’t have sufficient time to complete set goals • No need to worry about your allotted hours being up • It has better agency-client relationship Disadvantages • The client will feel as if they are don’t get value for their money if there are lack of updates • You are tied into a contract • It may be difficult to meet monthly challenges, especially in slow months. Project-Based Payment Most firms that provide monthly plans also offer project-based payment models. This plan is used to introduce services that a particular company offers. It can act as a middle ground between monthly and hourly plans since it gives more time for accomplishing goals. Advantages • You only pay in one lump sum • The pricing structure provides a clear contract • It lets you concentrate on a specific component of your design • The timeline is more straightforward Disadvantages • Some agencies may take advantage of their clients • You might be overcharged based on the time and effort required to complete the project • It is lacking in flexibility Which is the best plan? The best plan is the monthly payment plan. It requires you to pay a fixed payment per month and also allows for more time to attain your goals. Your design agency Seattle won’t give you an excuse of time constraint for not meeting targets because the deal is monthly. It is also cheaper than hourly and projects-based models.
How Nurse Call Systems Work

When carrying a casualty to the side or foot of a bed. When loading a casualty into an ambulance. Carry the casualty down stairs head first if the lower limbs are injured. Keeping their backs straight, all the bearers should squat and grasp the handles with their inner hands, palms inwards. On the order “lift”. All rise together, holding the stretcher with arms fully extended and keeping it level. When the patient has been placed on the stretcher the bearers should take tip their positions at each end of the stretcher. At least two trained bearers will be required to carry a stretcher and the person in charge of the casualty should always remain at the casualty’s head. If bystanders are available they should be used to help carry the stretcher to spread the load. However, there should be at least one trained bearer at each end of the stretcher. Unless a casualty is suffering from shock, the head should be kept higher than the feet. So as a general rule the casualty should always be carried feet first. However, there are a few exceptions: When going up stairs or hills when the lower limbs are not injured. When going down stairs or hills, when the casualty’s lower limbs are injured or the casualty is suffering from hypothermia as shown in Nurse Call Systems . At the order advance, move off together but walk out of step to avoid bouncing the stretcher. When you reach the ambulance, working together, gently and evenly lower the stretcher to the ground with the casualty’s head nearest the ambulance. A few ambulances have flat built – in beds with grooves to take the runners of a standard stretcher. Three people will be required to load an ambulance that does not have a self loading stretcher system. The three people will be placed as follows: One to stand on either side of the stretcher and one inside to receive and guide the stretcher into place and secure the stretcher. If there are only two berths, always load the left one first. If loading a trolley bed into an ambulance, two bearers should take up their positions, one on each side of the trolley bed. Working together, raise the trolley bed to the required height and carry it head first into the ambulance as shown in Nurse Call Systems. One bearer takes hold of the handles at the rear and gently withdraws the stretcher. As it is withdrawn a second bearer takes up position on the opposite side to the first bearer. (Bearers facing each other) when both have firm grip, the stretcher is withdrawn and once clear of the ambulance, is lowered to the ground.
Quick Tips For Caring For Your Projector And Screen Rentals In New Zealand

The utilization of projector screens in class, business meeting presentations, and entertainment is a common thing in New Zealand. Caring for your projector and screen rentals is paramount to enhance its lifespan and maintain optimal performance. Conventionally, dirt will accumulate on your projector screen, consequently, affecting its reflective properties. This calls for regular removal of the contaminants using simple procedures and tools. Screen surfaces vary, consequently, follow the outlined maintenance procedures and tools for your screen type. That being said, let’s explore tips to ensure your screen is in optimum condition. Avoid regularly touching your screen with bare hands Bare hands are oily and carry a lot of dirt. Thus touching your screen frequently will eventually lead to the formation of a hard-to-remove residue on the screen’s surface. The residue will require the use of harsh cleaning methods that may damage your screen. You may also end up accidentally scratching the surface with your fingernail tips. Therefore, use a microfiber cloth or dusting gloves, especially when cleaning your projector screen. Cleaning uncoated screens Uncoated screens are easy to maintain and clean. While you will still be required to be careful, using water and cloth will efficiently clean your uncoated screen. Moreover, use a mild soapy solution to remove nagging spots. Most importantly, utilize a soft cloth to avoid scratching the screen’s surface. Take caution to rinse the cloth frequently with clean water during the cleaning session. Using a dirty cloth will aggravate the mess. Always use up and down motions or sideways motions when cleaning your screen. Circular motions may damage your screen. Cleaning Coated Screens Coated screens are awfully sensitive when it comes to cleaning and handling. However, they offer better views but are highly susceptible to damage and scratches. You certainly don’t want to damage the reflective coating. Hence, avoid using harsh cleaners. They may reduce your screen’s reflective properties by stripping off the coating. In fact, experts in New Zeeland recommend the use of water when cleaning coated screens. Additionally, consider utilizing soft microfiber clothing. Lastly, dry the screen with a soft, clean piece of clothing or rag. Take Care When Removing Wrinkles Folding your projector screen for storage purposes may lead to the formation of wrinkles and creases. The deformations will distort images and videos, consequently leading to an awful presentation. Not all wrinkles will go away when you remount your screen. In addition, the weather may be chilly and hence smoothing the wrinkles using sunlight heat becomes impossible. However, avoid smoothening the screen with your hands or else you will scratch and begrime the surface. Moreover, consider ironing your screen, but avoid setting high temperatures. Much heat will permanently damage your screen. Using projector and screen rentals in New Zealand is a constructive way to present your ideas to an audience, whether during class sessions or business meetings. However, you need to care for your screen to elongate its lifespan while ensuring you get the most of its use. Use the tips outlined above to clean and handle your screen and consequently, enjoy a better presentations and views.
Quick Ways To Learn How To Use LinkedIn Like A Pro
Linked is undoubtedly a valuable tool for both individuals and businesses alike. From helping employees get new jobs to helping business owners get more clients, this professional network is a resourceful tool that can achieve a lot when leveraged properly. Do you want to become a LinkedIn expert? Well, here are quick ways to learn how to use this platform like a pro. Create a good profile summary With a good LinkedIn profile summary, you can easily market yourself to prospective employers if you are searching for new job opportunities. Create a summary that includes become a LinkedIn expert , education background, and your interests. Don’t forget to add a professional photo to your profile lest your profile ends up looking vague. Increase your network To increase your network on LinkedIn, you have to connect with other like-minded people. Connect with friends, coworkers, business colleagues and people whom you share similar interests with. You can use LinkedIn suggestions as a starting point. LinkedIn will suggest some of the people you can connect with. Also, accept connection requests from other people. But before accepting new connections, read through their profiles to see whether they are adding any professional value to your profile. Increase your standing Get recommendations from connections in your network. Recommendations are more powerful than the usual endorsements on LinkedIn. Recommendations can significantly increase your standing on LinkedIn, especially if you get them from the right connections or people with a rich professional background. Get recommendations from people whom you have worked with before. If these people we satisfied with what you did for them, then they can give a credible recommendation of the services that you offer. Stand out from the rest To use LinkedIn like a pro, you have to be unique from other connections on this platform. Several things can make you stand out from the crowd. For instance, be active on the platform by writing posts, endorsing and recommending others. Yes, if begin writing posts about your industry on a consistent basis, people will start noticing you as an authority in your niche. Another easy way to stand out from other users on the platform is to congratulate people on their work anniversaries or new jobs. Give proof of your professional expertise in your specific field. Also, give insights that can help other connections. Parting Thoughts LinkedIn is truly a valuable asset for those that know how to use it like pros. Now that you have solid ideas on using LinkedIn at your fingertips, you will ultimately leverage this platform for your maximum benefit.